The Acatenango Volcano overnight hike is one of the most popular activities for backpackers and travellers passing through Antigua, Guatemala in Central America. If you ask around in your hostel or accommodation in Antigua, most people will have done it or will be planning to do it (and they can help you put together your Acatenango packing list, too!). But don’t be fooled: Acatenango Volcano is a challenging hike, and you do need a reasonable level of fitness to do it (without losing your mind, at least).
I did the hike just a week ago, so while it’s fresh in my memory I’m noting down some of the things I was most grateful for, or things I wish I’d had, whilst I was doing the Acatenango Volcano overnight hike to create an Acatenango packing list.
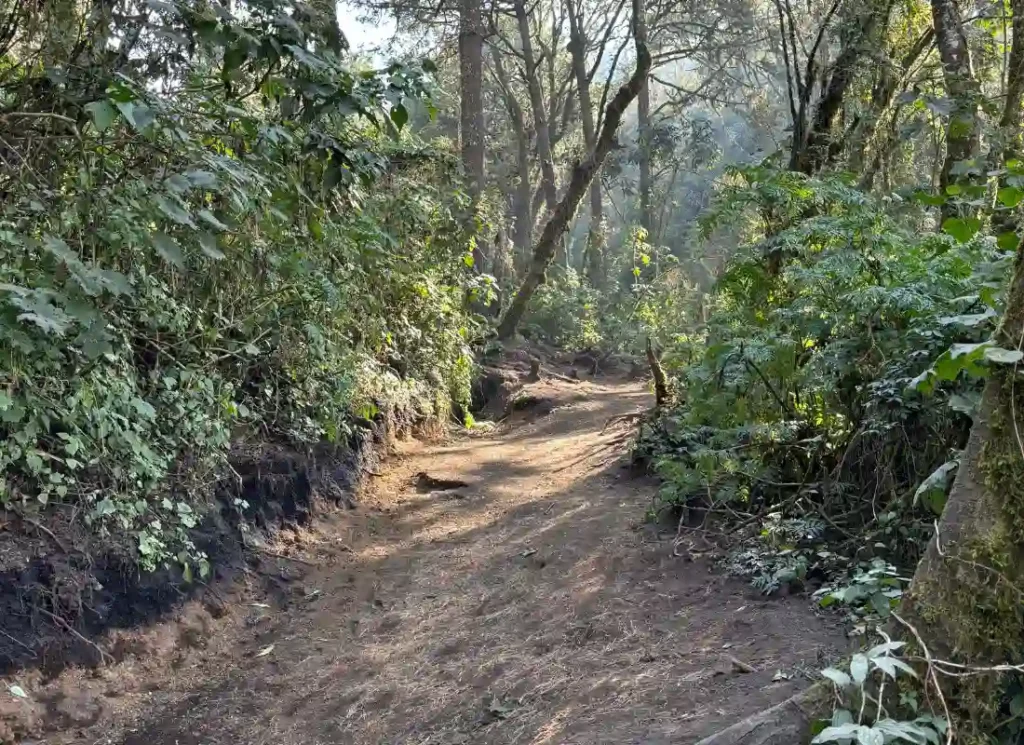
Important: The first part of the hike, especially the first two hours, is the hardest. Someone told me this before I went, and I’m so glad I knew that when we reached 20 minutes from the starting point and I was already out of breath. Don’t worry, you got this 😉
If you’re already well-acquainted with the hike, jump straight to the packing list.
The Basics for an Acatenango Packing List
You’ll be given certain things to pack by the tour operators on the morning of the Acatenango Volcano hike:
– Warm clothing
– Water
– Food
When it comes to personal items, I’d say take anything small that is going to make you a little more comfortable, as long as it’s not heavy.
Warm Clothes
I hadn’t packed much warm clothing for my trip through Central America, as my whole trip is going to be during the warmer seasons, so I was grateful to be given a hat, scarf and gloves by our tour operator for Acatenango. However, if you do have your own extra layers, take them with you. The ones we were given were not really great quality, and they were optional (some people on my tour group chose to take their own instead).
Luckily we also did this in Guatemala’s dry season (November to April). You’ll definitely want to take some waterproofs if you decide to hike Acatenango during the rainy season.
Water
You’ll also be given 3 litres of water to take, which is not optional. Two are to drink yourself, and one is to donate to the making of your dinner, hot chocolate, and breakfast at base camp. (3 litres is pretty standard, but check with your tour operator before you go).
Food
The food you’re asked to carry on the Acatenango hike will depend on your tour operator (and your tour price), but it’s likely that you’ll be asked to carry something. Like you’ll see below, I also recommend taking extra snacks!
Read more about Guatemala: How to Get from Antigua to Lake Atitlan by Chicken Bus
What Shoes to Wear for the Acatenango Overnight Hike
In my opinion, you need hiking boots or at least hiking shoes for this trip. I took hiking shoes, but I almost rolled my ankle so many times I’d recommend boots for extra stability. Don’t try and do it in trainers – you’ll regret it!
Packing List for Acatenango Overnight Hike – Extras
Walking Sticks
Because I’ll be travelling for months, walking sticks was not something I ever considered putting on my packing list (a note from Future Isa: I did end up buying walking sticks for future hikes and taking them with me all the way through South America).
When I spoke to someone from my hostel about the hike, she said “get the sticks” so seriously that I knew it wasn’t going to be optional, and it wasn’t. I honestly don’t think I would have finished the hike without them.
Your tour company may offer real walking sticks to rent for 50 Quetzales (around 6 euros), but people from our tour company only offered wooden poles for a much more reasonable 5Q each, and you can choose to take one walking stick or two. They are literally just bits of wood, but they completely saved this hike for me.
When you climb to base camp, it’s nice to put some weight onto your arms instead of putting all of the effort into your poor legs. In this respect they were useful but not essential.
They became essential when we climbed from base camp to Acatenango summit the following morning (if you can call 3.45am “the morning”). The entire trail is made up of thick volcanic ash. It’s like wading through knee-deep snow or, if you can picture it, the biggest cat litter tray that’s ever existed. My walking boots simply disappeared when I sank into the dust. And you walk through this stuff for 2 hours at a very, very steep incline. Anyone I saw who didn’t have sticks was using their hands instead.
They are also invaluable on your way down. Remember: steep + slippery = recipe for disaster. I don’t have great balance at the best of times, but with a heavy backpack I was even more all over the place. I fell straight onto my arse three times on our descent, and I’m not afraid to admit that if it convinces you to TAKE THE STICKS. You probably won’t fall onto your arse three times, because I’m clumsy as hell, but you’ll still be glad they’re there.
Read more about Guatemala: 15 Things to Do in Panajachel, Lake Atitlán
A Buff, Bandana, or Something To Cover Your Face
Going back to my earlier cat litter tray analogy… if you’ve ever put out cat litter you’ll know that it comes with a huge cloud of impermeable dust, and volcanic ash is no different.
It was so intense that for some of the summit ascent I used a Covid mask. Even then, my snot was black for days. And, the last thing you want to deal with when you’re dealing with the perils of high altitude is feeling like you’ve accidentally inhaled a whole packet of Marlboro Gold.
Luckily on our way down someone from our tour group gave me a buff/bandana to cover my face, and it helped a lot. With the altitude and the exercise, you don’t need a third reason for your lungs to hate you!
A Cap & Sunscreen
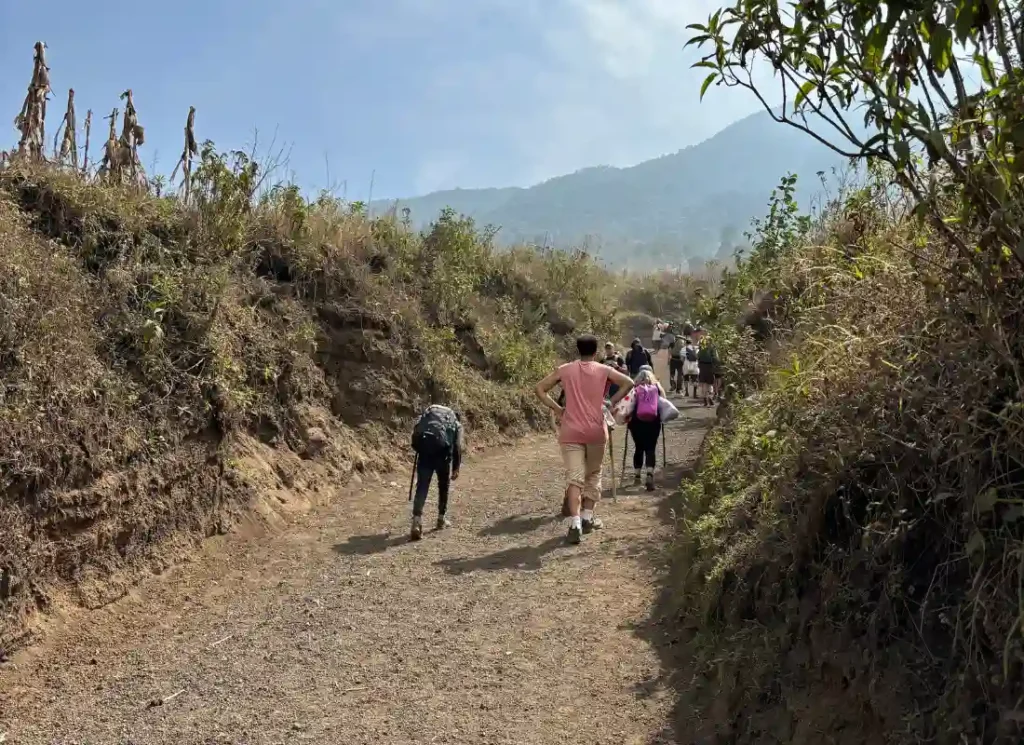
Especially for the first two hours of the Acatenango hike, you’re going to be in direct, sweltering sunlight. Suncream is a must, no matter your skin type, and a cap will help. I didn’t have one (I only took a woolly hat, preparing too much for the cold and not enough for the warm!).
Caps don’t take up much weight or space, so it’s worth taking to keep the sun out of your eyes and face, even if you only use it for the first two hours. I’m also quite prone to burning my scalp, so a cap will help with this, too! (Top tip: change your parting every day so the same bits of your head aren’t constantly exposed to the sun).
If you decide hike to the summit of Acatenango Volcano the next morning, you’ll also have the strong morning sun in your face and eyes on your way back down. Remember that the sun is stronger at altitude, so it can burn you even first thing in the morning. Put on sunscreen at the start of the hike (you probably wouldn’t think to, because it’s pitch black) and stick your hat into your day bag (luckily, you get to leave your main rucksack at Acatenango base camp for the additional hikes).
Toilet Paper & A Disposal Bag
There are bathrooms at several of the stops on the way up, but toilet paper is scarce. It was a hot commodity on our hike!
After three or four checkpoints, you’re on your own. The toilets (which are more like holes in the floor anyway) are no longer at your disposal, and it’s time to start crouching behind bushes. A little toilet paper goes a long way when you have to wee in a bush (and that’s if you’re lucky, some people in our tour group had to poop in a bush, too).
Remember to take a plastic bag with you, put your toilet paper in it, and take it to a proper bin. Littering is never cool, but especially not when you’re halfway up a volcano next to a UNESCO Heritage site.
At your camp there will be a toilet. It may or may not be fit for purpose, and it may or may not have toilet paper. That’s all I’ll say on that matter.
A Head Torch
A head torch will come in handy if you decide to do either of the additional hikes beyond walking to Acatenango base camp.
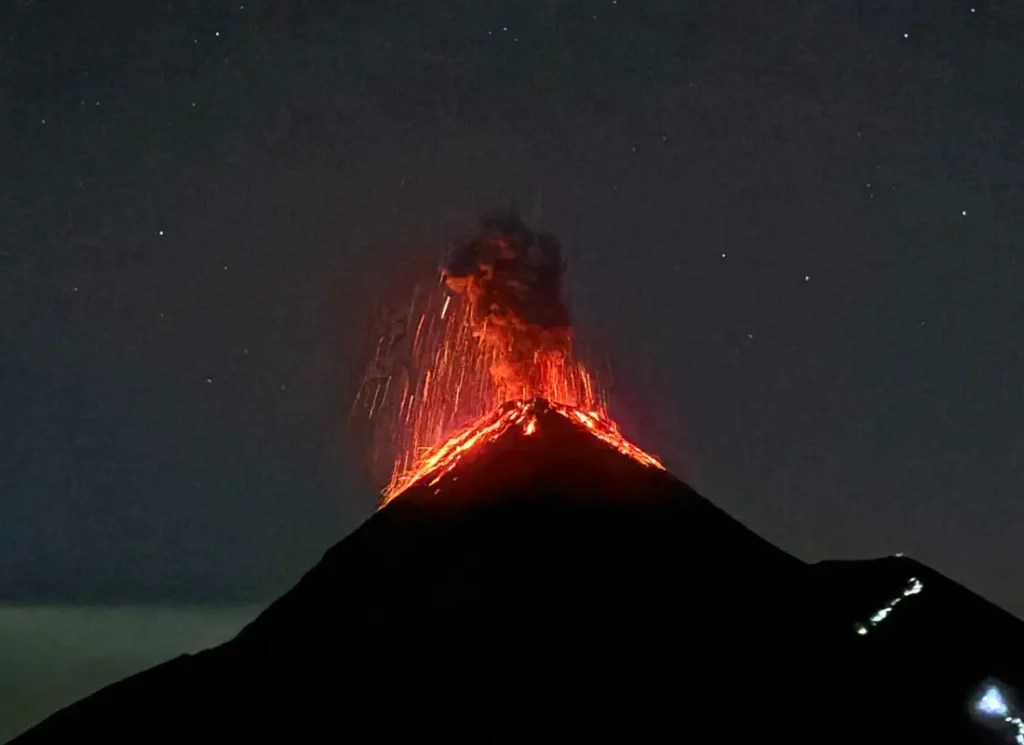
The secondary hike to see Fuego Volcano (Volcan de Fuego) up close (you’ll hear the hike called “Fuego” for short) is done either at sunset or at night depending on how long it takes you to get to base camp, but at the very least you’ll be walking back in pitch black. I didn’t do this hike, but I heard from people in our group that it was really hard, and it’s only worse not being able to see. You’ll be able to see Fuego Volcano (which is a very active volcano) erupting from base camp. But if you want the best views, doing the hike will get you much closer.
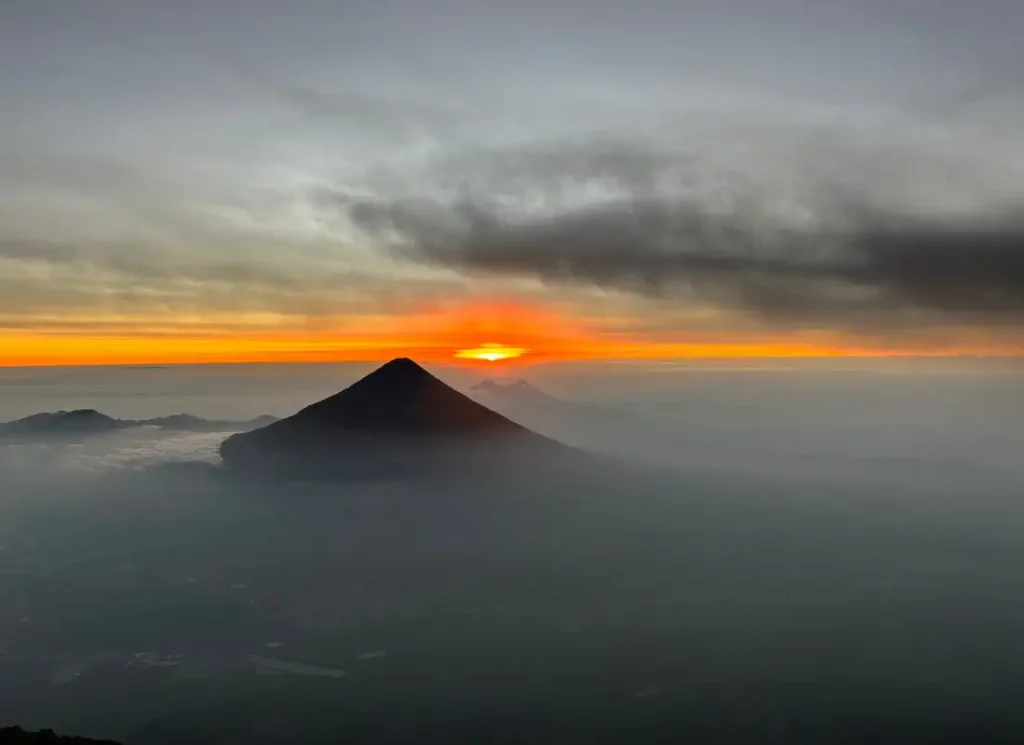
The aim is to reach the summit of Acatenango before sunrise, so of course, you have to leave Acatenango base camp well before then. We were woken at 3.45am, left camp around 4.10am, and arrived at the summit just before the sunrise at 6am. The whole of the summit hike was done in the dark, and I didn’t have a head torch. There were a lot of people walking together (many tour groups are doing this hike at the same time) and there was always someone to help me out, but it would have been easier with my own torch. There were moments when I had to wait for someone to shine a light for me because I couldn’t see where to step next!
If you’re only planning on going to base camp, you probably won’t need a head torch.
Read more about Guatemala: 6 Ways to Get from Guatemala Airport to Antigua
Altitude Sickness Pills & Painkillers
We were recommended to take altitude sickness pills before and during our hike. I don’t know how much they helped because I’ve never been to that altitude before, but this hike does have an elevation gain faster than is recommended by doctors. I still got some sickness and a slight headache, so I guess that would have been worse without the pills. I took paracetamol for the headache and it went away pretty quickly.
It’s also recommended to stay in Antigua (1,500m) for at least 48 hours before the hike so your body can acclimatise.
The altitude sickness pills that we took are diuretic, which we didn’t realise before we took them. I had to get up to pee four times the night before our hike and twice during the night we spent at base camp, which definitely impacted my sleep and energy levels. So that’s something to consider before you take them!
Remember that, whilst altitude sickness pills can help, they don’t put oxygen back into the air. So, take it easy on yourself, and if you’re starting to feel unwell then take a break and let someone know.
People from our group also had medication for sickness, diarrhoea, etc, which you may want to take just-in-case.
Rehydration Sachets & Energy Gel
It was Ellie’s idea to bring these rehydration sachets travelling with us (mostly for hangovers and street food sickness) and they were a godsend on this hike. She made one for me when I got back to base camp from the summit hike, and it felt like it saved my life. I’d decided not to take any water to reduce how much weight I was carrying, but in hindsight that was a mistake.
These sachets really help to keep up your electrolytes when you’re sweating and doing intense exercise, and they weigh practically nothing.
A few people in our group had energy gel pouches too, which are great for a boost of energy when you’re feeling low. We mostly relied on biscuits, but they take up more space in your backpack 😉
Extra Snacks
Speaking of which… take extra snacks, and lots of them! We took protein bars, crisps, breakfast biscuits, nuts, you name it, and it all got eaten. Tours do include meals, but snacks are important for energy between meals and sometimes just for morale, too. At the first two or three stops on your way up, there are limited snacks and drinks for sale depending on which route you take.
Altitude and altitude sickness can also reduce your appetite, so eating little and often can make sure you’re getting enough energy. It’s also not a good idea to eat a big meal during the hike anyway – I snacked on the lunch pack they gave me all the way up.
The meals they give you will vary with every company, but we got cooked vegetables, rice, and bread. The non-vegetarians got chicken and less vegetables. Although, if you’d heard the story we’d heard about the group that got food poisoning during the Fuego hike, you’d probably go for the vegetarian option too…
Guatemalan Quetzals in Cash
We paid 300Q in Guatemalan Quetzals for our hike. Some things may have been lost in translation, as there were people in our group that didn’t realise there would be an extra cost.
You have to pay another 100Q for entry into the national park (unless it’s included in your tour, which it often is not), and the people in our group who did the hike to Volcan Fuego paid another 200Q. We had all been told it would cost 100Q, but it wasn\’t until we arrived that the tour guide told us it was 200Q.
Originally I had wanted to do the Fuego hike, but by the time I got up there I knew I needed to save my energy for the summit. So, play it by ear, but make sure you take some cash in case you want to go.
A lot of people in our group planned to do both the Fuego hike and the summit hike, but most of them didn’t make it. They told us that Fuego was much harder than they expected and didn’t have any energy left to do the summit hike the next day.
Of course, if you’re a seasoned hiker and you’re used to high altitudes, you probably won’t find it much of a problem. I’m saying this as an average-Joe of average fitness before I did the hike.
I’ve not done many popular hikes, so I wouldn’t know what to compare it to. A few years ago I climbed Ben Nevis, the highest mountain in the UK, and I’d say that Acatenango is at least twice as hard.
Warm Layers
At the beginning of the Acatenango overnight hike, you’ll be so warm you almost wished you wore shorts. That is, of course, if you’re wearing trousers. Around 30% of our group wore shorts and later changed into trousers – the rest of us suffered through the first couple of hours.
As you reach base camp, it starts to get real cold. The last hour of the trail is flatter than the rest, so you’re doing less exercise, you’re high up, and the sun is not far from setting. This all means we ended up walking with almost all of our layers on.
Once the sun goes down at base camp it gets bitterly cold, we guessed around 5 degrees Celsius (but that really was just a guess). If you’re sleeping in tents, you’ll need more layers. We stayed in cabins, which were basically wooden huts with one very large built-in bunk bed that had eight sleeping bags on the top and nine sleeping bags on the bottom. Our cabin was full, so we were actually quite warm all night with so much body heat. I didn’t even sleep with my sleeping bag zipped up! I heard from other groups with less people that the cabins got cold at night time, so go prepared for that just in case.
Most companies will provide you with a warm coat, gloves and a hat. They’re not of the best quality, so go with your own if you have them, but if you’re travelling without any warm layers then they’re certainly better than nothing.
If you hike to Acatenango Volcano summit the next day: take all of the layers that you have. I don’t know how cold it was up there, either, but we ended up facing a sharp wind and I was shivering uncontrollably even with a base layer, a t-shirt, jumper, thick coat, hat, scarf and gloves, and two thick pairs of trousers. (We stayed at the summit for about half an hour, and I felt like I was going to freeze to death… by the time we reached base camp I’d stripped off all my layers again.)
—–
If you’ve done the hike, let me know in the comments what you couldn’t have lived without!
Hello! I just read your blog about the volcano hike. I am wondering if you still remember the name of the travel agency (and maybe the location) you paid 300Q? Thank you!
Hey Leo! I wouldn’t necessarily recommend the agency I used. We found that, in the end, the majority of people ended up paying the same amount, as we had to pay 300Q plus entrance fees and additional money to do the Fuego hike, etc, whereas other people paid maybe 500Q but that included everything. I’d recommend asking your accommodation and checking what is included in the price, as almost everyone we met (including us) booked it via their accommodation 🙂